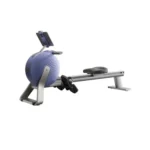
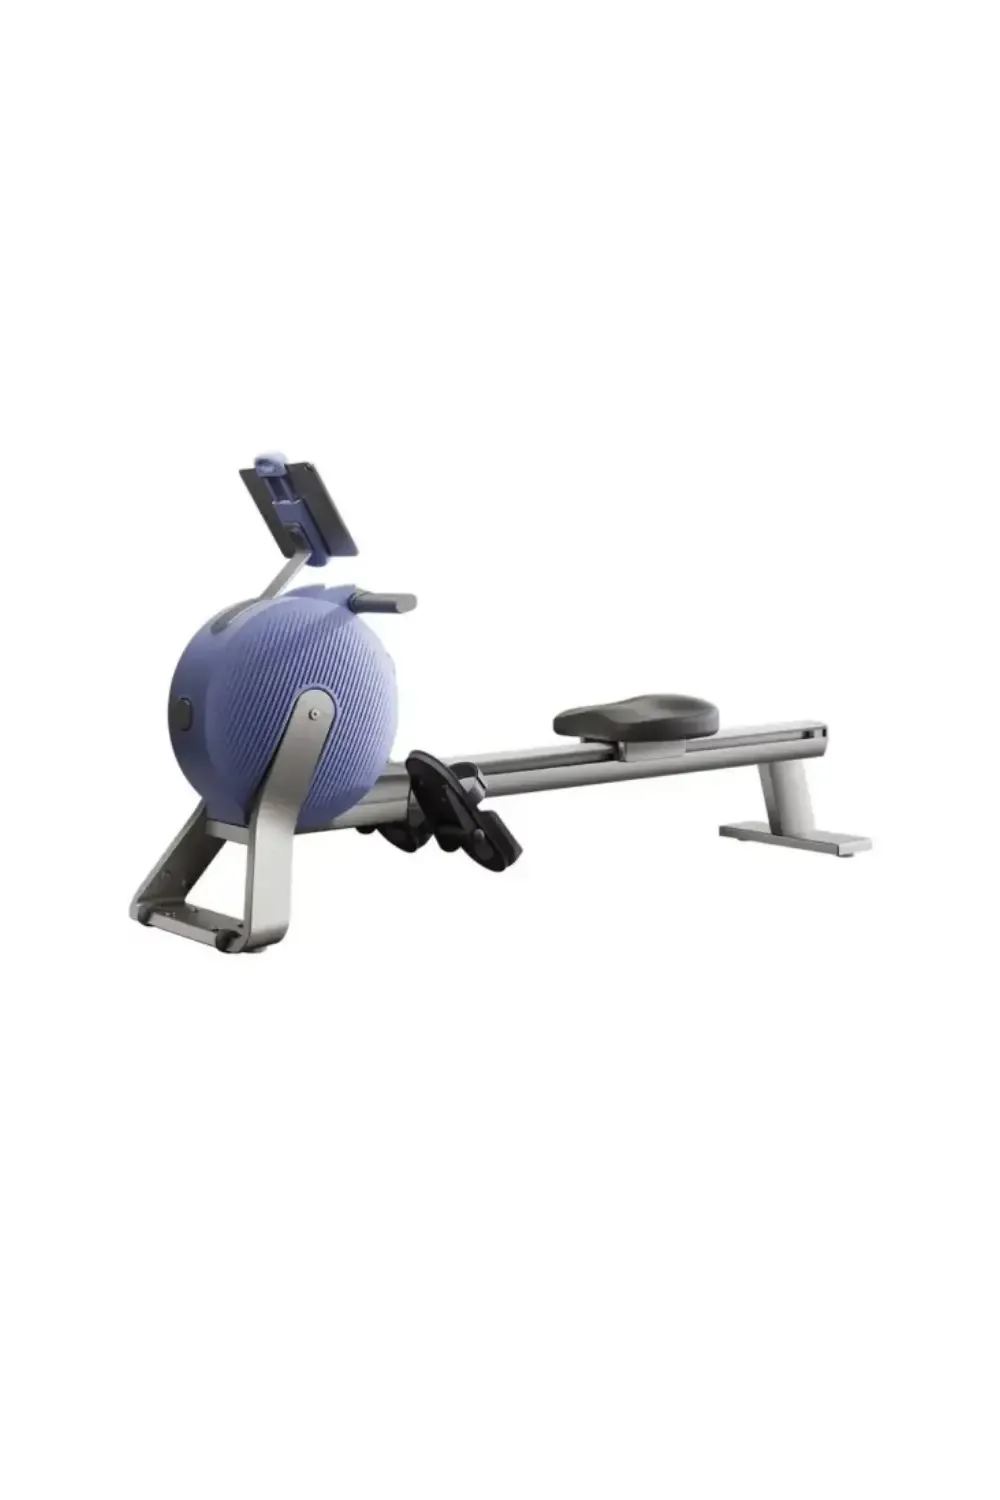


Features
- Self-generating power: No external power needed—row and create your own energy!
- 32 Levels of magnetic resistance: Smooth, adjustable tension for all fitness levels.
- Smart app connectivity: Link to the YPOOFIT App for interactive workouts and real-time tracking.
- Durable aluminum frame: Lightweight, sturdy, and built for heavy daily use.
- Vertical storage design: Space-saving and easy to move after your workout.
- Ergonomic comfort: Padded seat, non-slip footrests, and a smooth rail for a natural rowing feel.
- Clear LCD display: Track time, distance, strokes, calories, and heart rate with ease.
How to exercise with the V3 Rowing Machine – Step-by-step guide
The V3 Rowing Machine delivers a powerful, low-impact, full-body workout that strengthens your muscles, boosts cardiovascular fitness, and burns calories efficiently. Follow this beginner-friendly guide to start rowing the right way:
1. Setup before you start
- Adjust the footrests: Place your feet securely on the foot pedals and tighten the straps across the widest part of your feet. Your feet should feel stable but comfortable.
- Grip the handle: Hold the handle with an overhand grip (palms facing downward), keeping your wrists flat and relaxed.
- Select resistance: Use the console to select your starting resistance level—beginners should start at a lower setting (around 5–10) and gradually increase as fitness improves.
- Check your posture:
- Sit tall with your back straight.
- Engage your core (tighten your abdominal muscles).
- Keep your shoulders relaxed and away from your ears.
2. The rowing stroke – 4 basic phases
A. The Catch (Starting position)
- Bend your knees and slide forward toward the flywheel.
- Lean slightly forward from the hips (not the lower back).
- Arms should be fully extended, back straight, and core engaged.
Tip: This is your ready position before you start each stroke.
B. The drive (Power phase)
- Push off powerfully with your legs first.
- As your legs straighten, lean slightly back (about 100–110 degrees from vertical).
- Pull the handle toward your lower ribs using your arms after your legs are almost fully extended.
Tip: Think “Legs, Body, Arms” — in that order.
C. The finish (End of the stroke)
- Your legs are extended, back is slightly leaned back, and hands are pulled in just below your chest.
- Elbows should be drawn back, close to your body.
Tip: Maintain a strong core to protect your lower back.
D. The recovery (Returning to start)
- Extend your arms out first.
- Lean your torso slightly forward.
- Bend your knees and slide back to the starting position (the Catch).
Tip: Think “Arms, Body, Legs” — the reverse order of the Drive.
3. Structuring your rowing workout
- Beginner session (10–15 minutes)
- 5 minutes: Easy steady rowing (warm-up)
- 5 minutes: Moderate pace (build endurance)
- 5 minutes: Slow pace (cool down)
- Intermediate session (20–30 minutes)
- 5 minutes: Warm-up at low resistance
- 10 minutes: Alternating 1-minute fast + 1-minute slow
- 10 minutes: Steady moderate rowing
- 5 minutes: Cool down
- Advanced Interval Session (High-intensity training)
- 5 minutes: Warm-up
- 8 rounds: 30 seconds sprint (high resistance) + 90 seconds easy rowing (low resistance)
- 5 minutes: Cool down
4. Important rowing tips
- Use your Legs: 60% of the power should come from your legs, not your arms.
- Maintain smooth rhythm: Keep a fluid, continuous motion—don’t jerk or pause too much between phases.
- Watch your posture: Always keep your back straight, chest lifted, and core tight.
- Breathing: Exhale during the drive (pushing) phase and inhale during the recovery (returning) phase.
5. Cool down and stretch after rowing
- Hamstring stretch – Hold for 20 seconds per leg
- Hip flexor stretch – Hold for 20 seconds per side
- Back stretch (Child’s pose) – Hold for 30 seconds
- Shoulder stretch – Hold for 20 seconds per side
With the V3 Rowing Machine, every session powers your heart, strengthens your muscles, and brings you closer to your fitness goals!
Do’s and Don’ts when using the V3 Rowing Machine
Do’s:
- Warm up first: Always spend 5–10 minutes warming up to prepare your muscles and prevent injury.
- Use proper technique: Focus on correct form — legs push first, then core and arms.
- Adjust foot straps securely: Make sure your feet are firmly strapped in before starting.
- Start slow: Begin with a comfortable resistance and increase gradually as you build strength and endurance.
- Row smoothly: Maintain a fluid, continuous motion throughout the entire stroke cycle.
- Engage your core: Keep your abdominal muscles tight to protect your lower back.
- Stay hydrated: Keep a water bottle nearby and sip during your breaks.
Don’ts:
- Don’t pull with just your arms: Rowing is a full-body movement — avoid relying only on your arms.
- Don’t slouch: Always sit tall with your back straight to prevent strain and injury.
- Don’t rush the recovery: The return phase (recovery) should be slower and controlled, not rushed.
- Don’t hold your breath: Breathe rhythmically — exhale when pulling, inhale when returning.
- Don’t overtrain: Allow recovery days to give your muscles time to heal and grow stronger.
- Don’t set resistance Too High Initially: High resistance too soon can compromise form and lead to injury.
Follow these simple rules and you’ll get faster, safer, and more enjoyable results with your V3 Rowing Machine!